
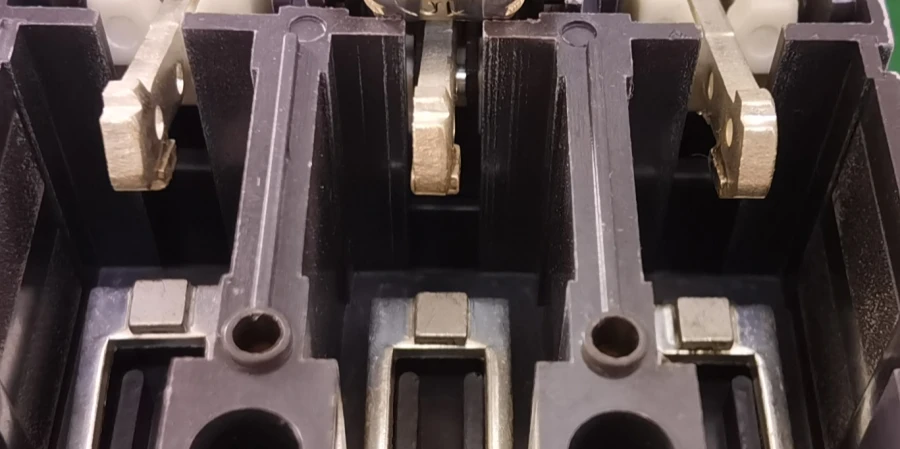
A few days ago, a customer who buys MCB CKD kits from us asked me a question: How do you check the contact area of a breaker during production?
To be honest, most customers who buy parts don’t usually ask about this. Because manufacturers have already taken care of these details during production, so the customer mainly needs to do the assembly work. I assume this customer was partly asking out of curiosity.
But it was a very good and practical question. Since contact quality is important but not something you can easily see after the breaker is assembled, I thought it would be useful to share how a manufacturer actually check it during production.
What Does Contact Area Mean in Production?
When we talk about checking the contact area of a circuit breaker, we are not simply measuring the contact surface in square millimeters. In production, what matters more is whether the moving and fixed contacts make sufficient and consistent contact when the breaker is closed.
There are several things we need to consider: contact alignment, contact pressure, and the actual contact footprint between the two surfaces. If the contacts are misaligned, the pressure is insufficient, or the actual contact area is too small, the contact resistance can increase and may eventually cause localized heating.
That’s why we don’t rely on a single method to check contact quality. We look at the contact footprint, alignment, contact pressure, and electrical contact resistance from different angles. Each method tells us something different, so let’s start with the simplest one: checking the contact footprint.
Checking Contact Area with the Paper Impression Method
In the real production, checking the actual contact area between the moving and fixed contacts is actually quite simple. We use a sheet of white paper and a sheet of carbon paper. We put them together and place them between the moving and fixed contacts. Then we close the breaker as we normally would.
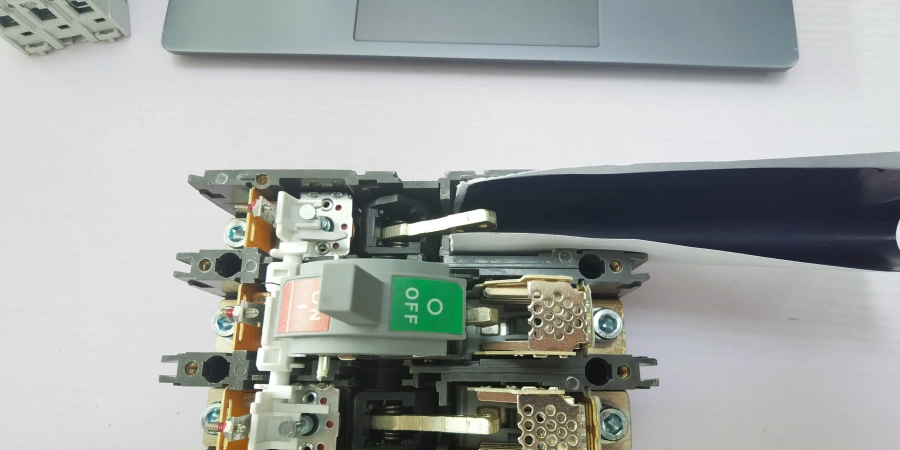
When the contacts close, they leave an impression on the paper. After opening the breaker, we take out the paper and check where the impression is and how large it is. This gives us a simple way to see where the two contacts are actually touching and roughly how large the contact area is.
We mainly look at two things: where the contacts are touching and how much of the contact surface is covered. If the impression is even and covers the required contact area, it usually means there is no obvious problem with the contact assembly or closing position. If the impression only appears on a small part of the surface, or is clearly shifted to one side, we need to check the contact position, movement, and contact pressure.
For production workers, the biggest advantage of this method is that it is quick and easy to understand. We don’t need complicated equipment to find some obvious contact or assembly problems.
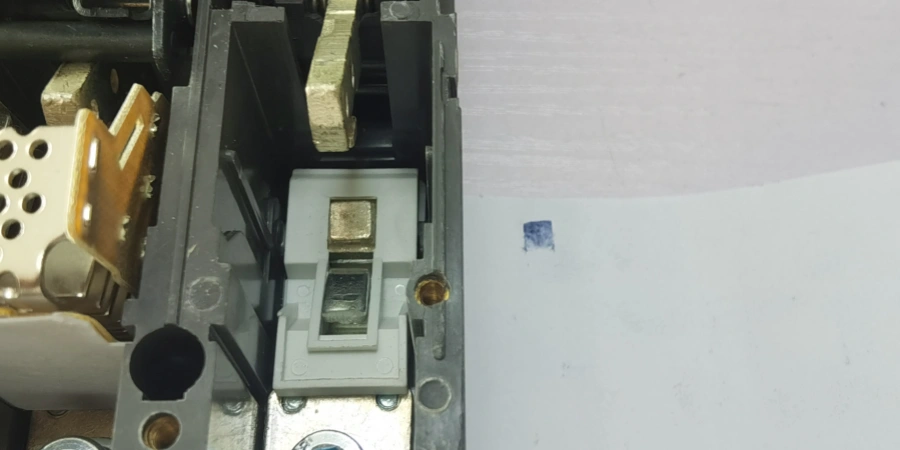
This is actually not a new method. One of our workshop technicians told me that some breaker manufacturers in Yueqing were already using this method in the 1990s.
This method may be a little old-fashioned, but even today, it is still the simplest and most effective way to check contact quality. It is quick, easy to use, and gives us a clear visual result without the need for complicated equipment.
So, how large does the contact impression need to be to pass?
There is no fixed percentage that applies to all manufacturers. Different products and manufacturers may have different requirements, and there is no national standard that sets a specific percentage for the contact impression area.
In our factory, the requirement is that the actual contact impression should be more than 25% of the surface area of the fixed contact. This is our own internal requirement, not an industry-wide standard.
Some manufacturers with less strict requirements may consider even a visible contact line to be acceptable. For us, however, simply having a line of contact is not enough. We want the actual contact area to reach the required range.
Of course, the contact impression only tells us about the mechanical contact condition. It does not fully tell us how the breaker will perform electrically during actual operation. For example, oxidation, contamination, or other conditions on the contact surface can affect contact resistance.
That’s why, after the contact impression passes our check, we also carry out follow-up tests according to the product and production requirements. One example is a temperature-rise test, where we check how much heat the breaker generates when operating under its specified current.
This gives us a more complete picture of contact quality, looking at both the mechanical contact and the actual electrical performance.
Another Way to Check Contact Quality
Another way to check contact quality is to measure the resistance between the terminals when the breaker is closed.
This method looks at the electrical performance of the contact, rather than only checking the physical contact impression. A higher contact resistance may indicate that the contacts are not making good electrical contact.
In some larger factories or highly automated production lines, both the paper impression method and contact resistance testing may be used. The paper method gives a direct view of the contact impression, while resistance testing provides another way to check the electrical connection.
In simple terms, the equipment used for this test is basically a resistance meter. On an automated production line, the meter can be built into the production equipment. As the breakers move along the line and pass the testing point, the equipment automatically measures the contact resistance. The products can be tested as they move through the line, without having to stop the production process for a separate test.
In our experience, the paper impression method is still widely used in everyday production. It is simple, quick, and easy to use on the production line. So even when a factory also uses contact resistance testing, the traditional paper method can still be a practical part of production.
Besides these two methods, we also check the contact surfaces and contact alignment during production. These checks can help identify obvious problems such as contamination, damage, or misalignment. However, they are mainly supplementary checks rather than direct measurements of the contact area.
Final Words
Reliable contact performance starts with the right checks during production. The goal of inspection is not only to find problems after they happen, but also to build a production process that can identify potential issues early and help keep every product working reliably.
In real production, different inspection methods are usually part of the overall quality control process. When these checks are properly built into production, they can help identify and improve assembly issues, maintain product consistency, and support stable product quality over time.